Making a procedurally generated medieval city in Blender 3.1 with Geometry Nodes
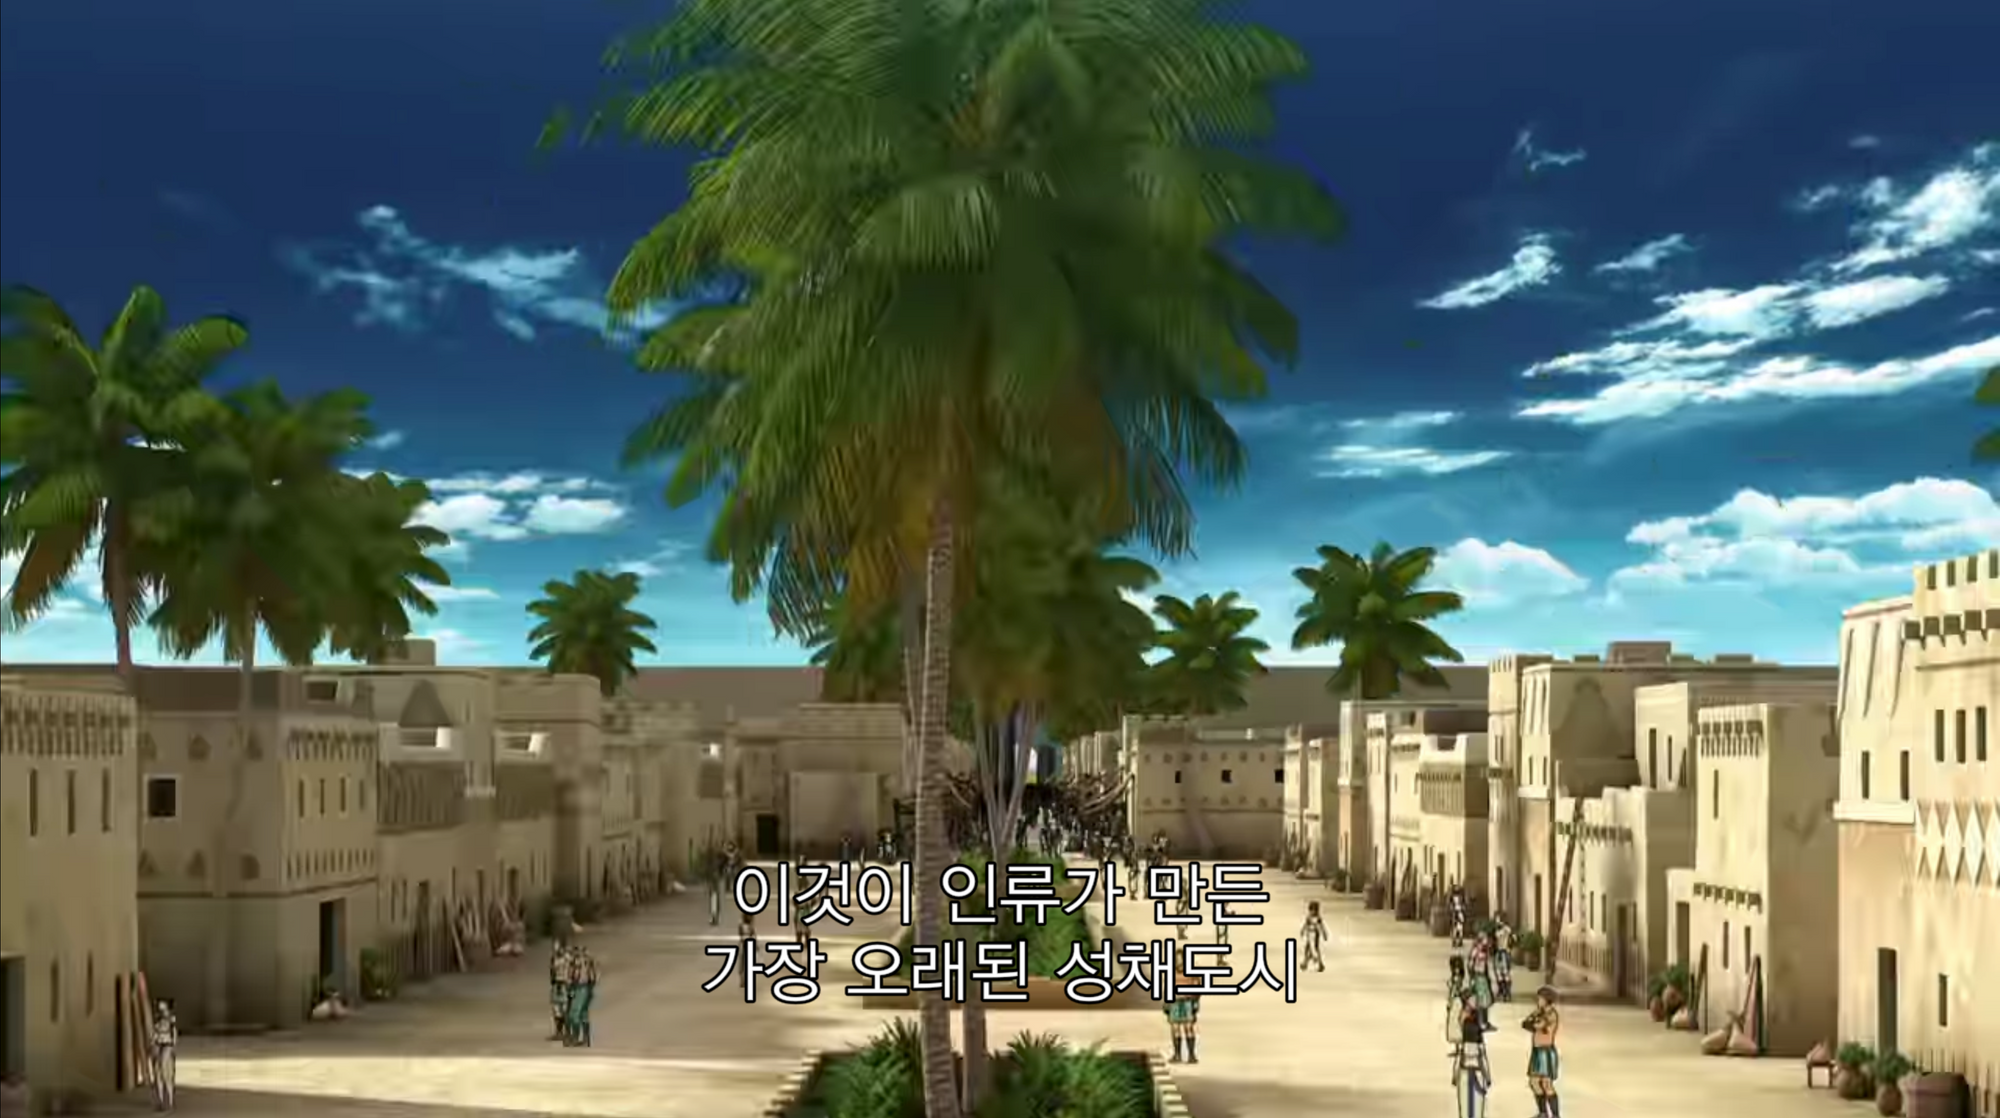
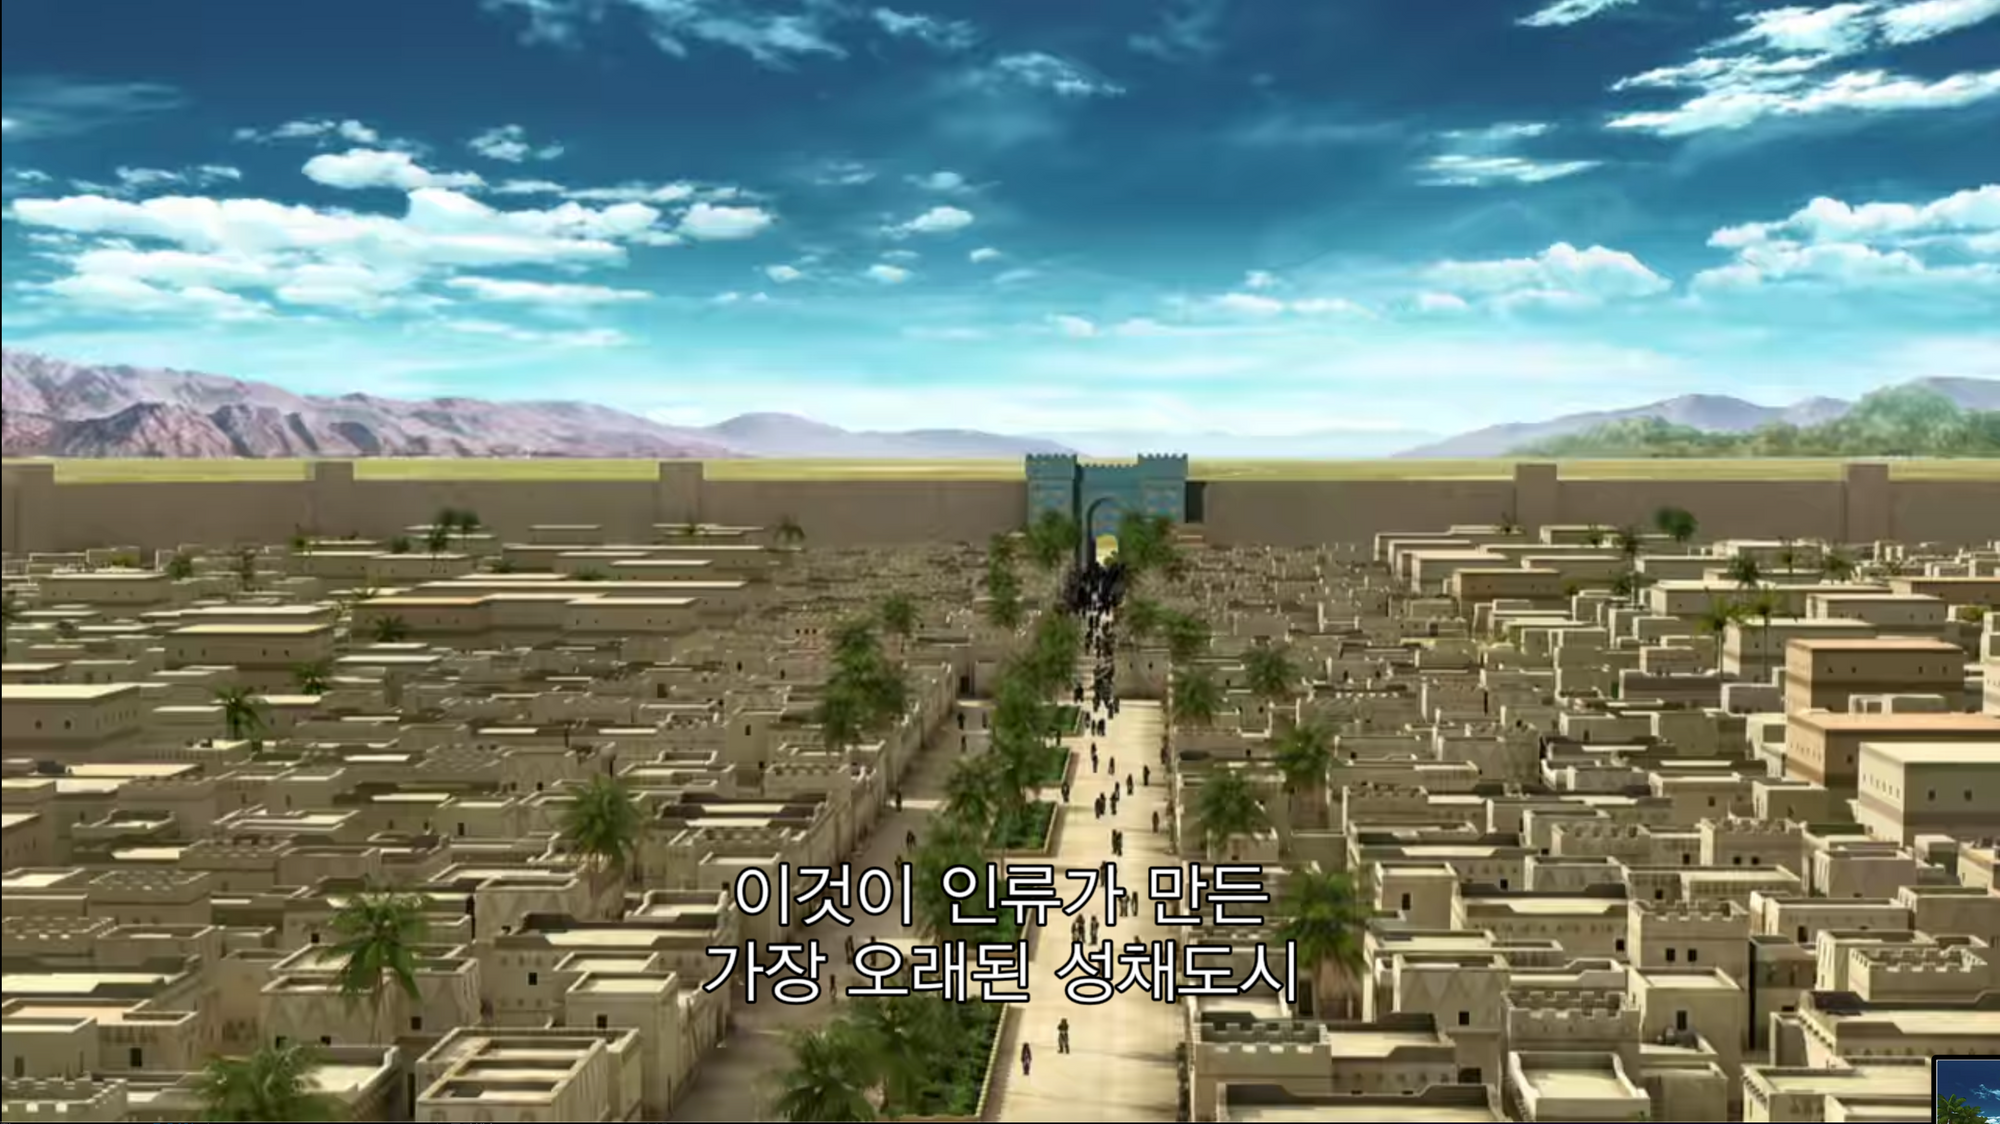
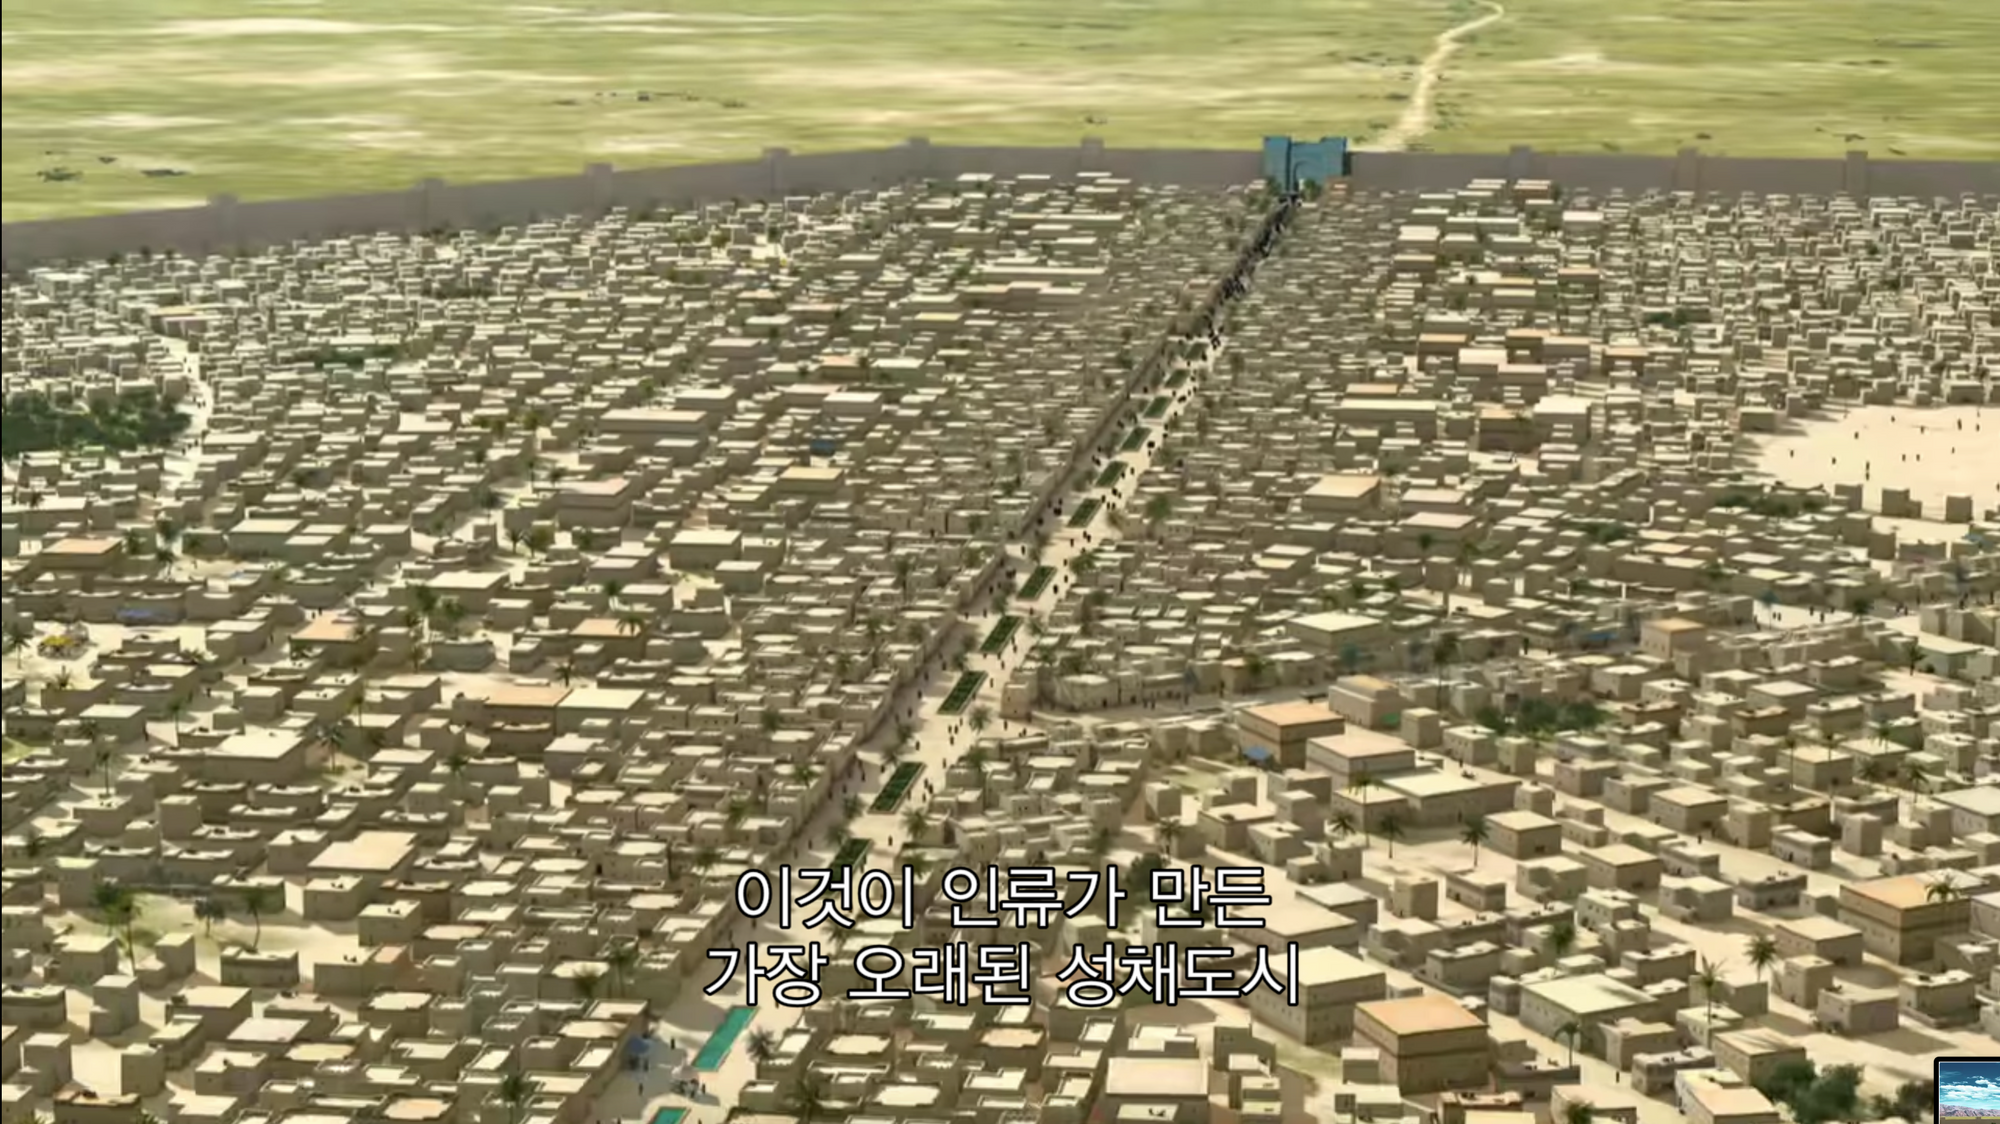
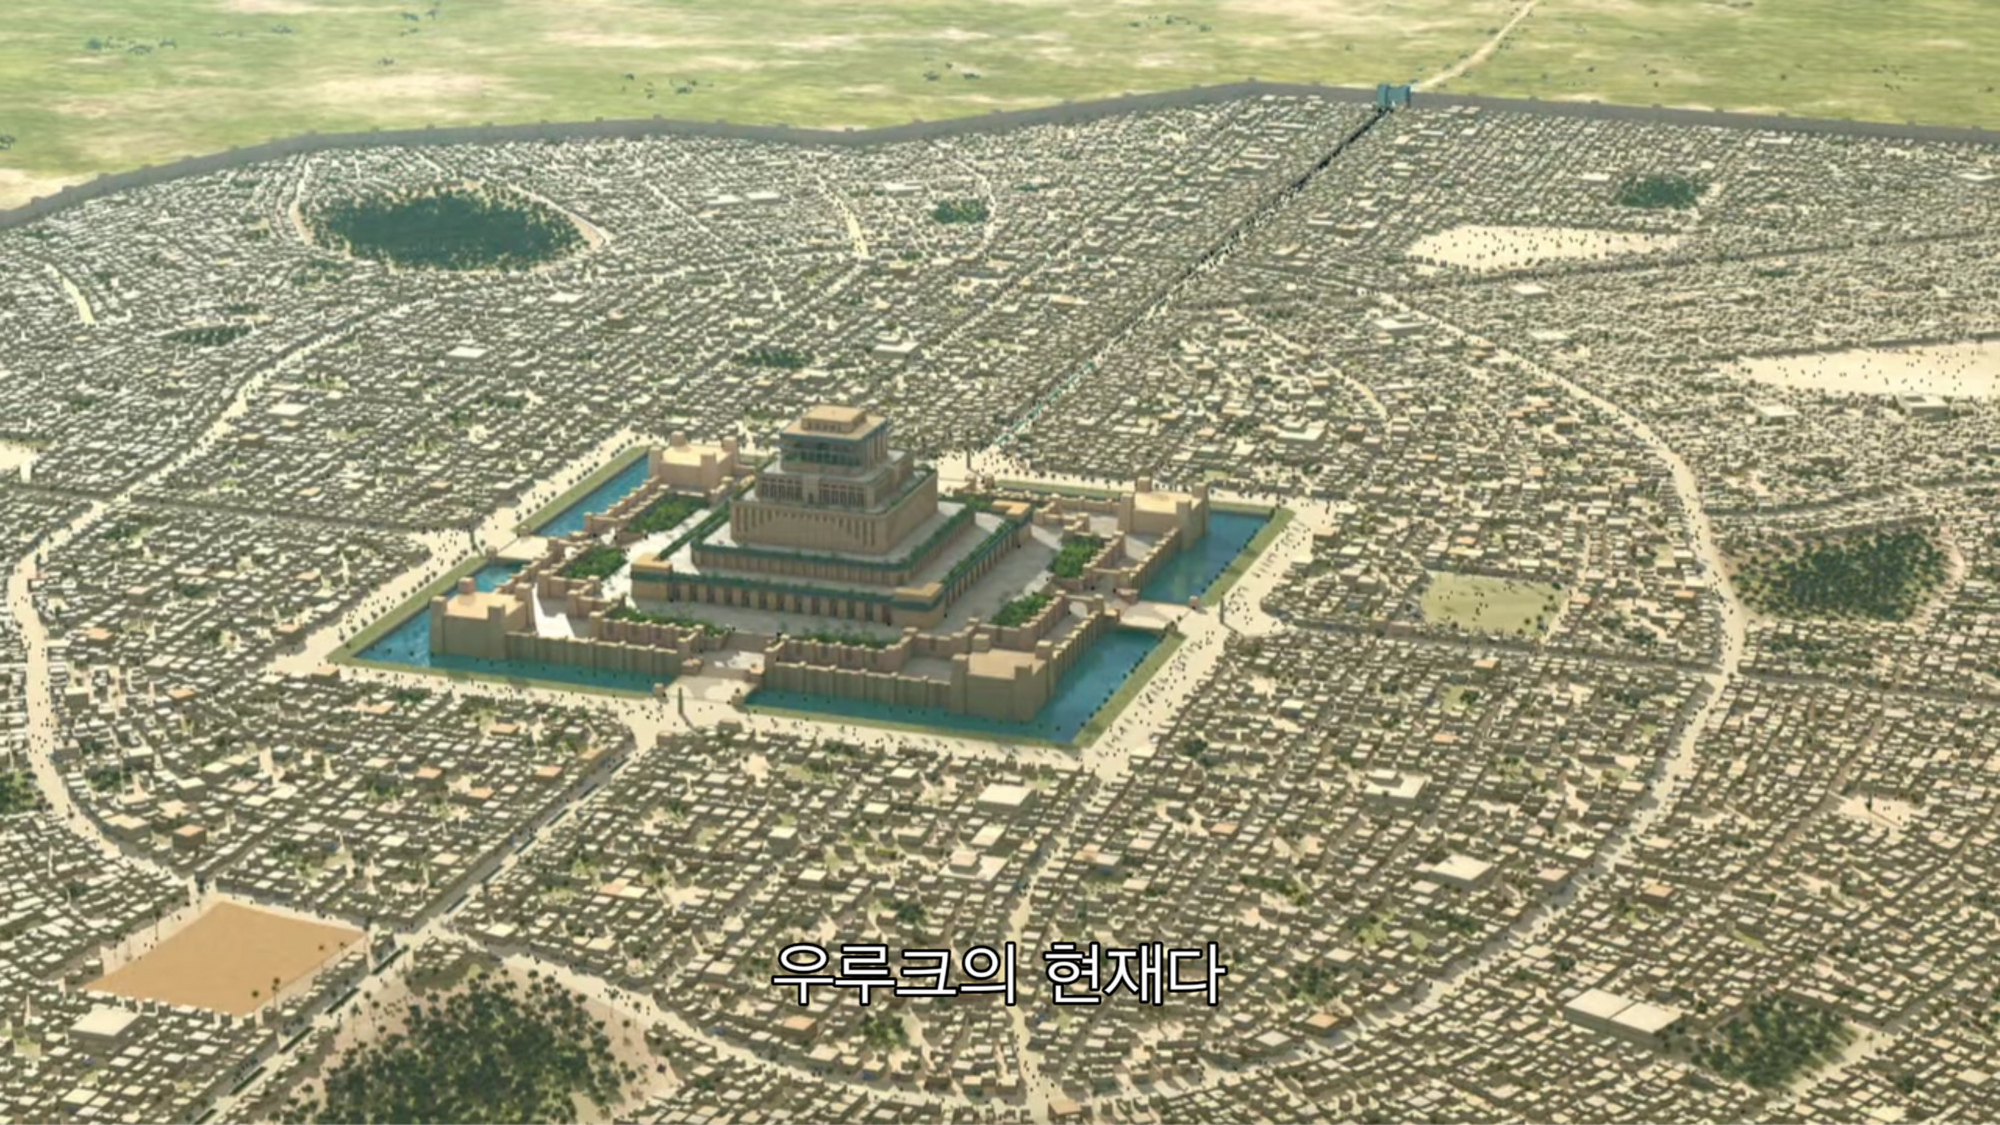
I was watching some anime the other day and there was a scene where the protagonist enters the city of Babylon. They are astounded by the sheer scale of the city. Inside the walls, you can see huge avenues, countless homes and buildings. And in the center, stands the palace.
Reference
Here are a few screenshots from the scene in question. If you're curious, the anime is Fate/Grand Order on Netflix.

Approach
I wanted to make it so that if I draw the outline of the city, it will generate everything. It'd start with drawing avenues, then splitting the areas with smaller streets, and within those neighborhoods, it'd generate houses.
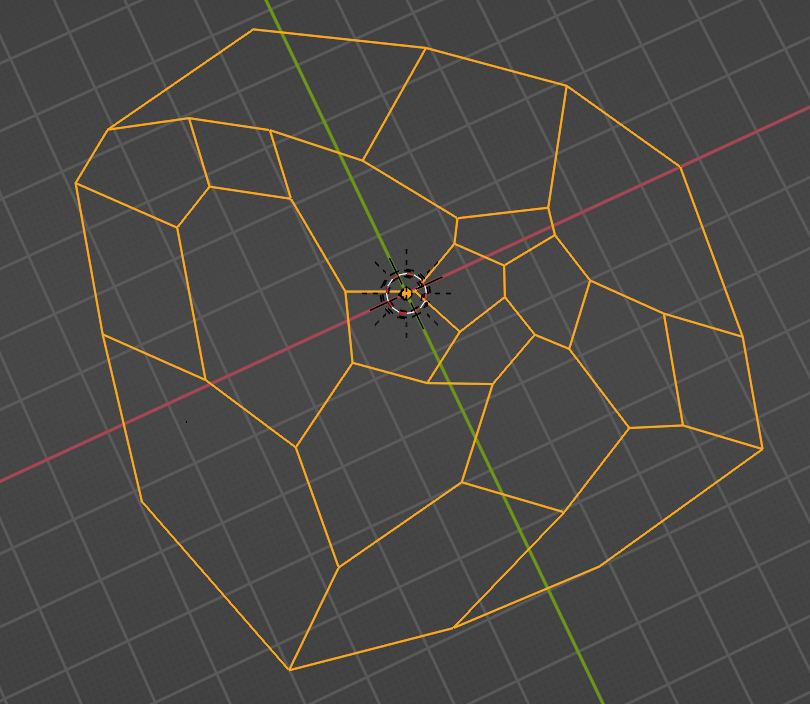
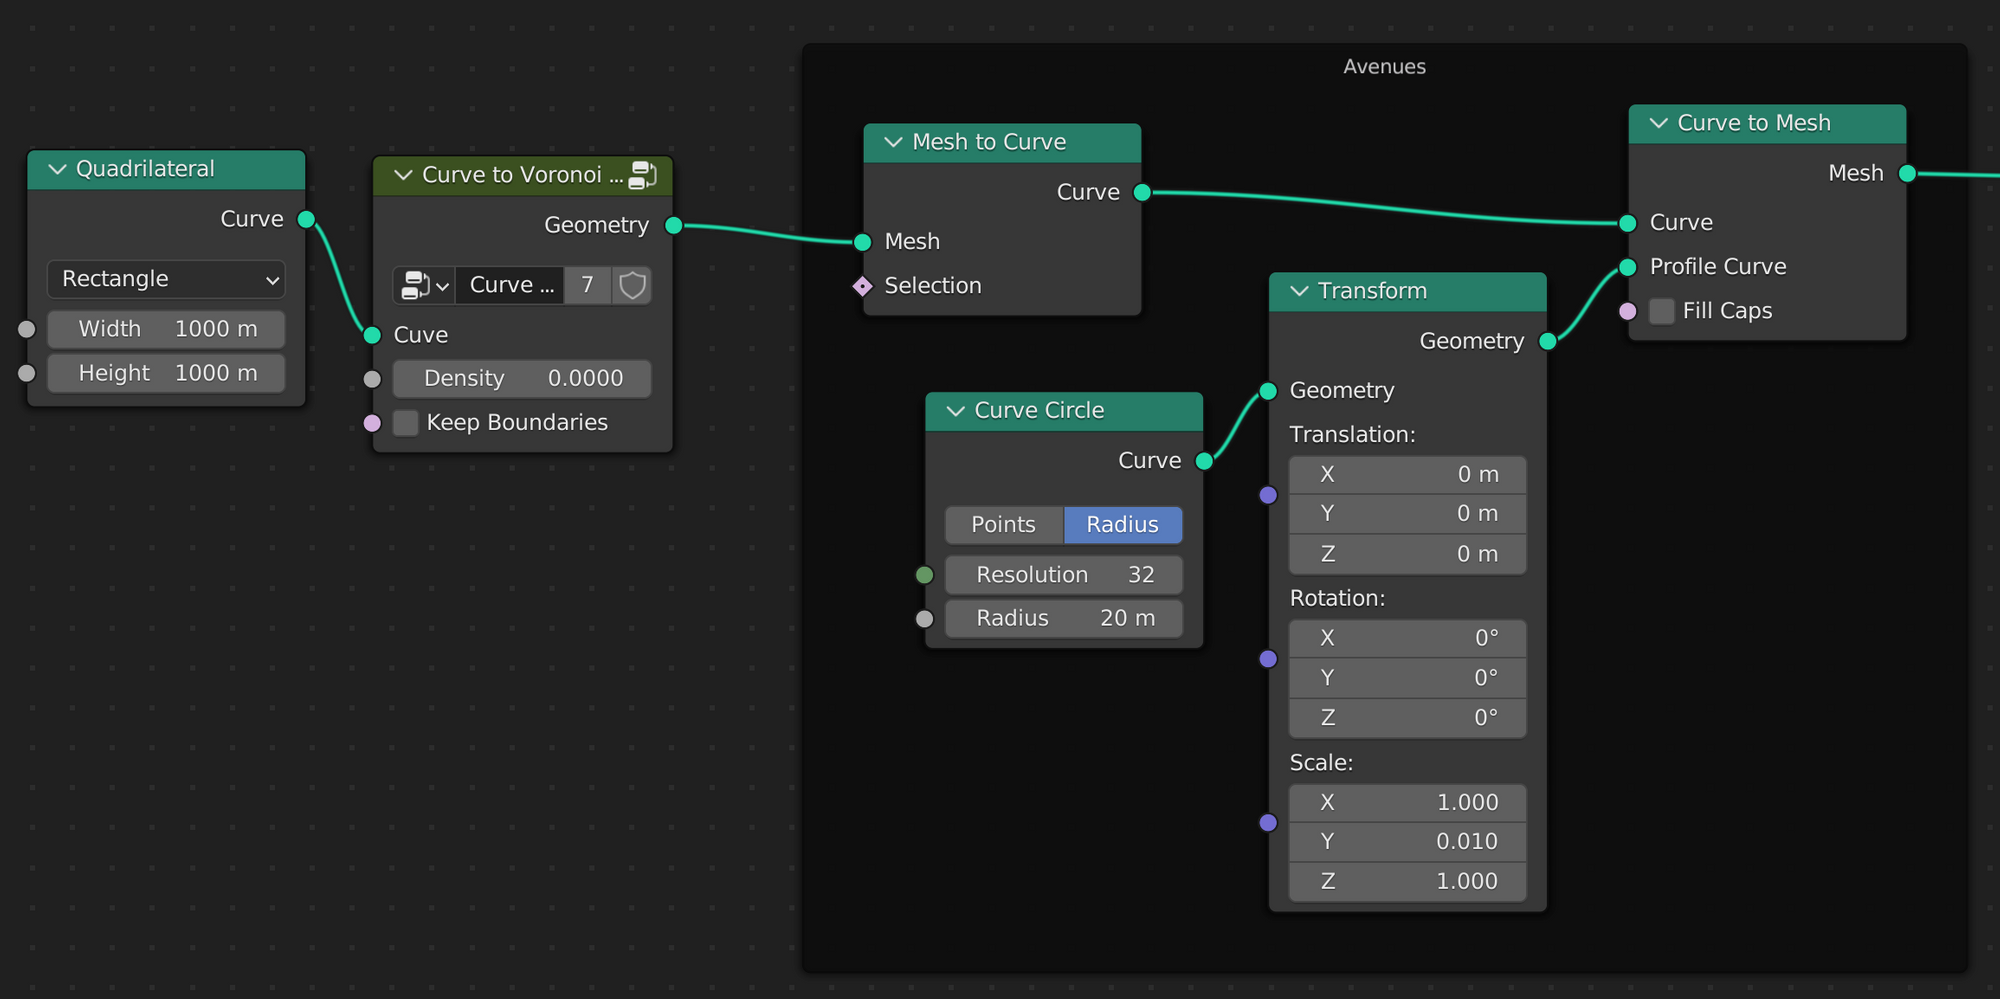
Avenues
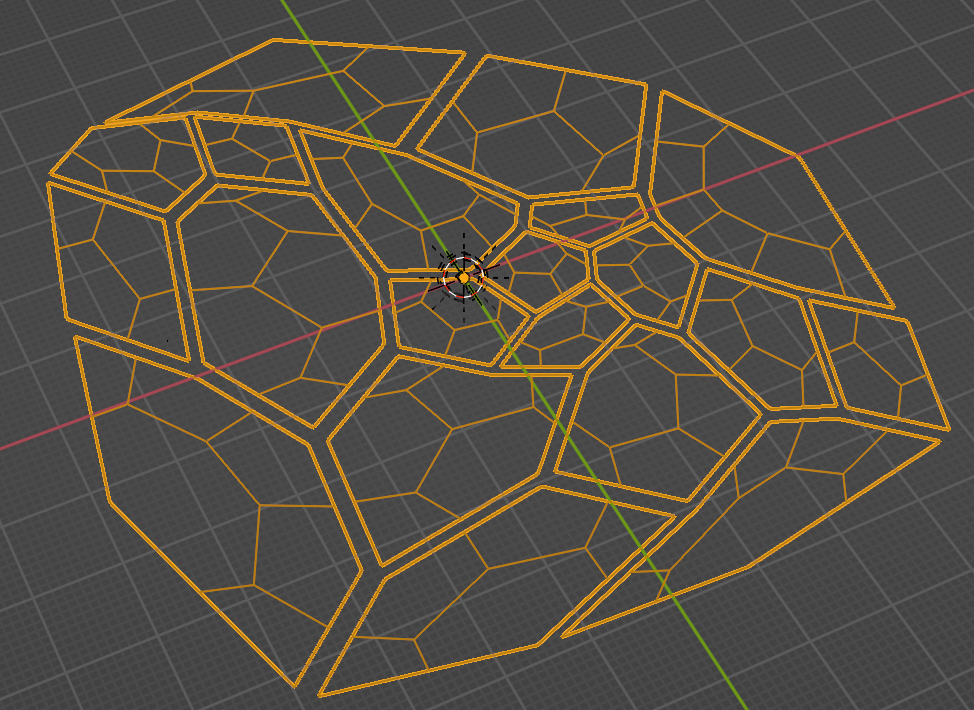
Using the Geometry Node I created in the previous post to generate a Voronoi-like mesh, I end up with these avenues:
To transform this into something that can be rendered, I would ideally turn each segment into a mesh strip. I haven't found a way to do it yet, so I settled for a very flat circle. I'll revisit later.
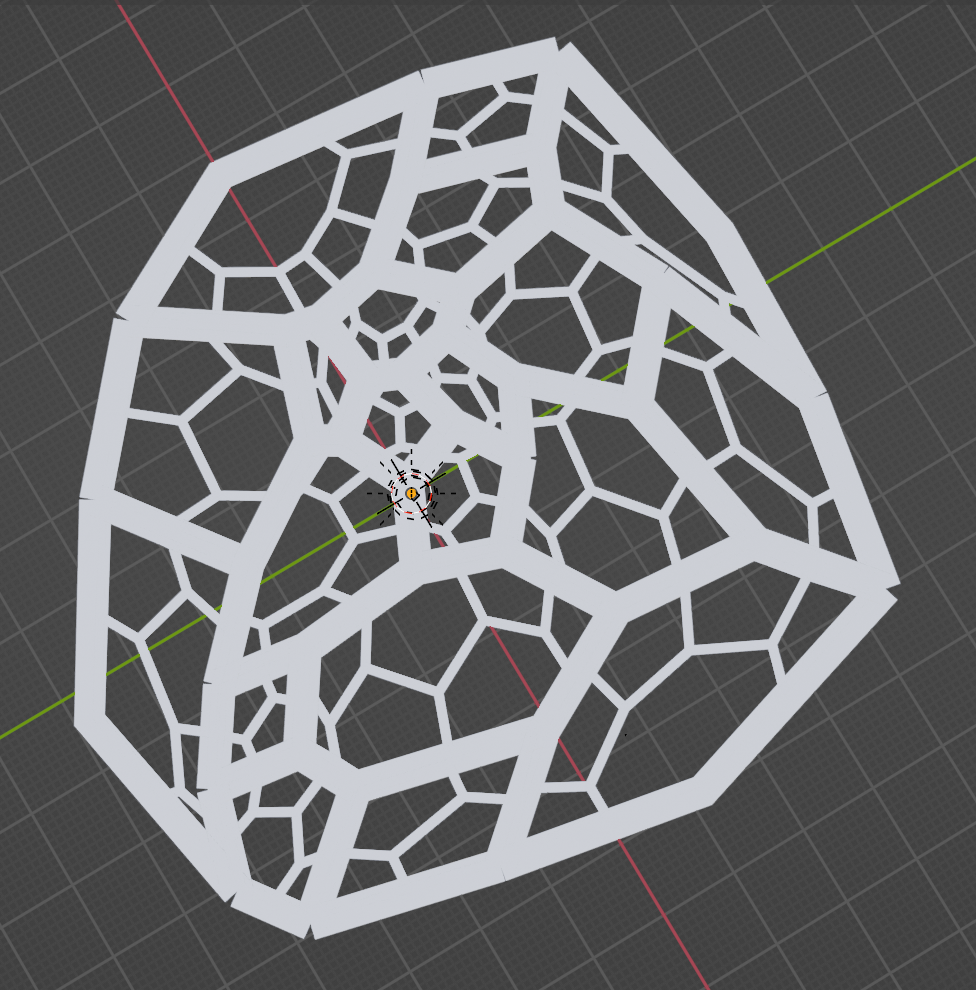
Streets
In order to generate streets, I wanted to generate Voronoi-like patterns for each individual face.
Recursive Voronoi pattern
If I simply set it up like this: Curve of the city outline ⇒ Curve to Voronoi mesh ⇒ Mesh to Curve ⇒ Curve to Voronoi mesh, Blender actually outputs nothing. To properly "Voronoize" each face, I had to do a few things.
Using standalone faces
First I had to make each face a standalone face (ie adjacent to none other) using the Split Edge node.

Scaling down each face
Next I had to scale down each face in-place ever so slightly. See this post to see how to do it.
Once each face was separate, the "Voronoize" node worked everywhere. I wonder if it would work if we forced each edge vertex to only be used by one edge. Something like "Split Vertices" instead of "Split Edges". Maybe I'll try later. For now, our workaround suffices.
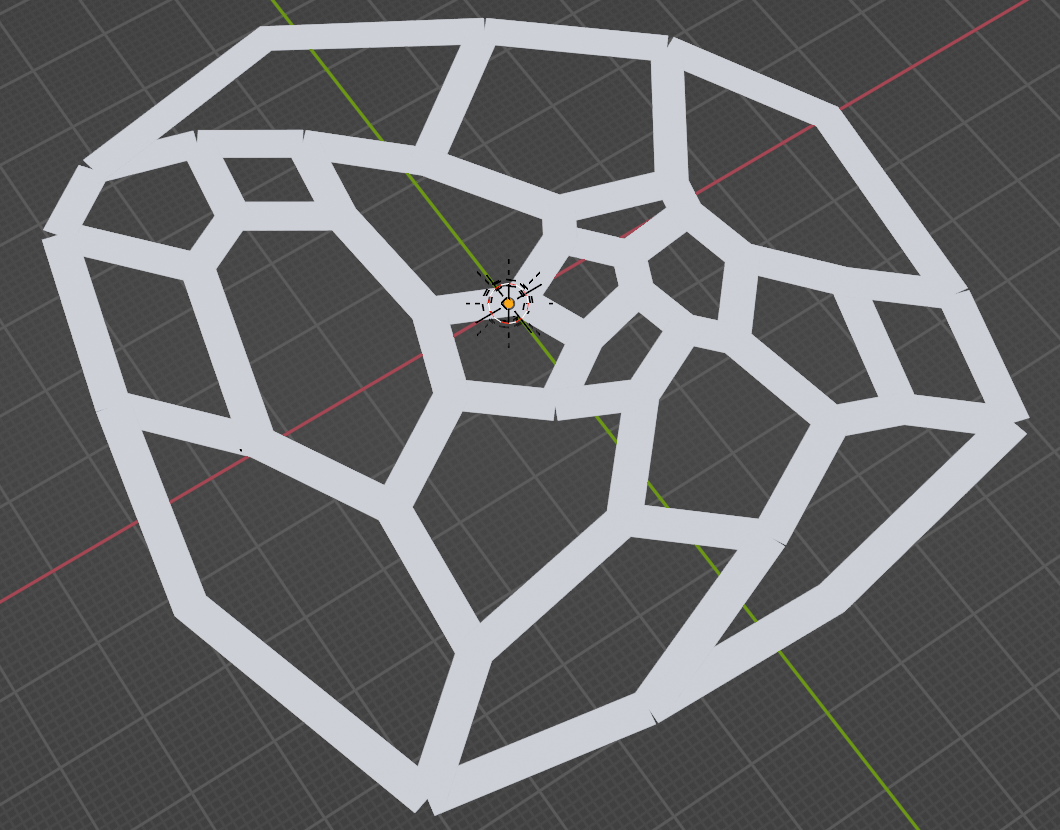
Finally I converted the street curves to meshes using the same method as for avenues, albeit with a narrower Circle Curve.
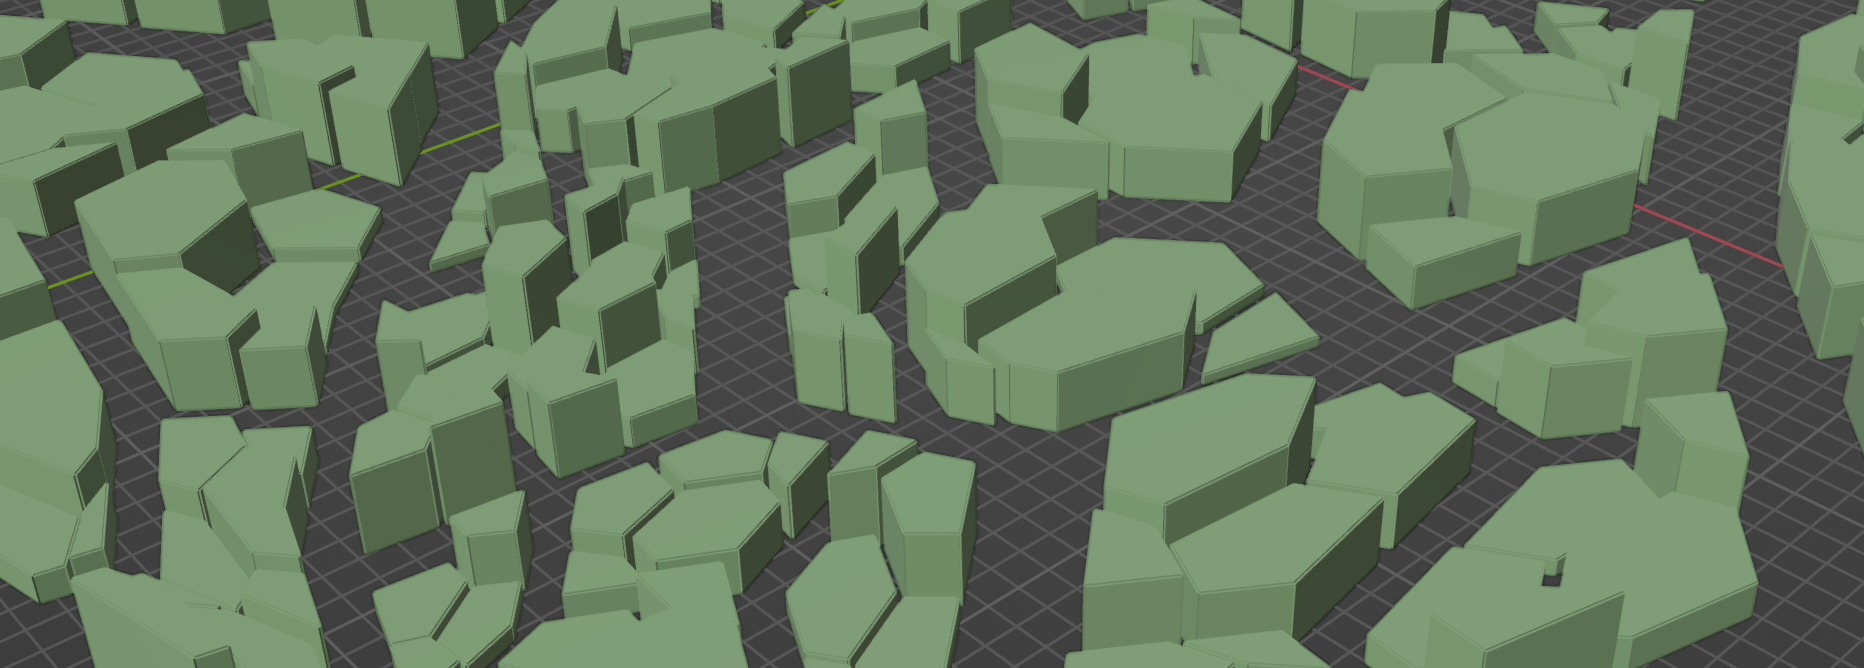
Houses
First approach: extrude faces
Walls and Roofs
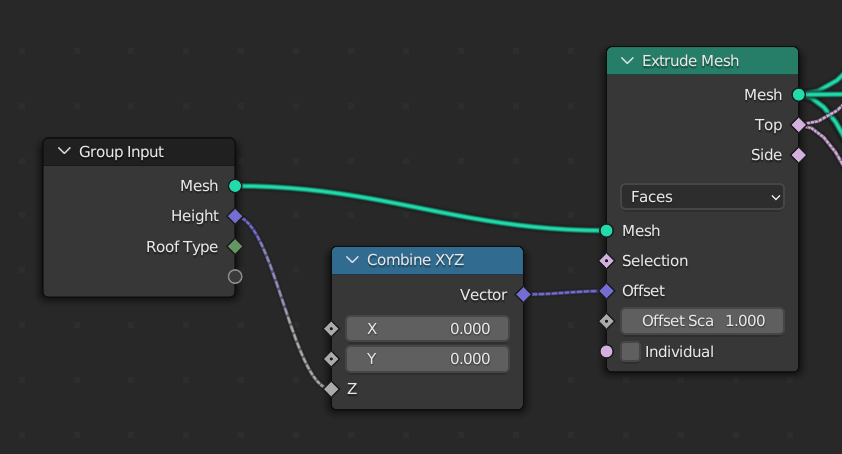
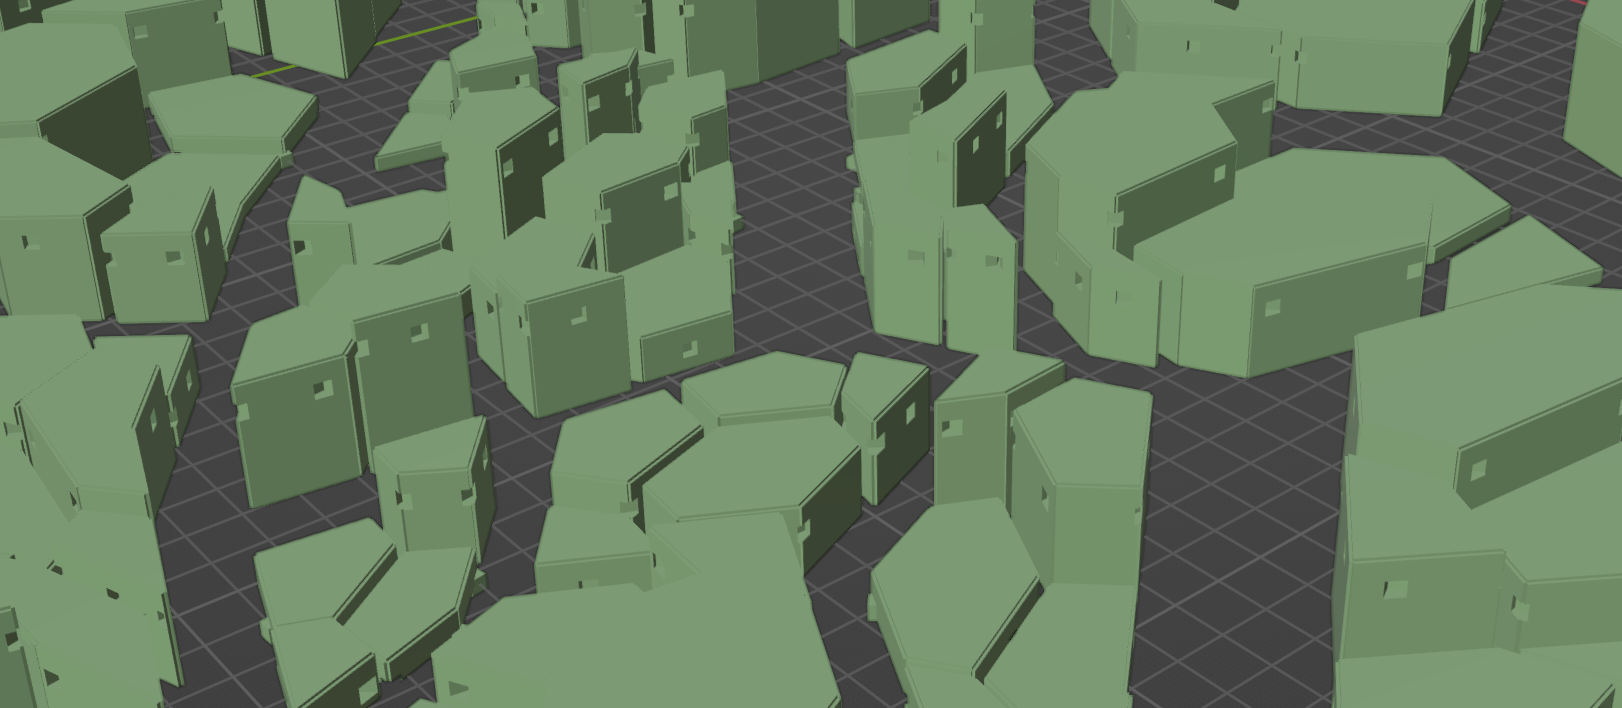
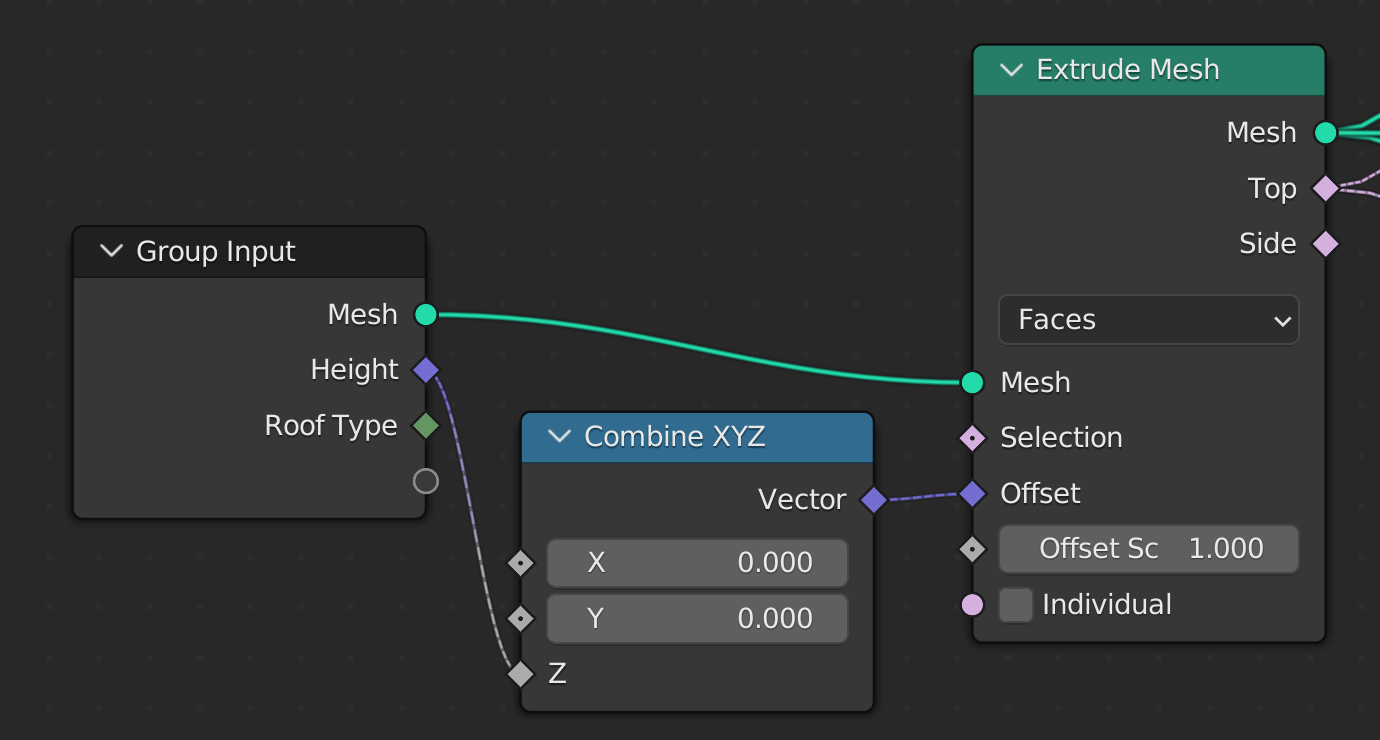
Once I had streets, I could use Voronoi once again to define building-level faces. Each face would define the shape of the building, a floor plan of sorts. I would scale each face down to leave some space between each building. Then I would use the Extrude Mesh node to elevate that shape to become the building's rooftop. Btw, this node is brand new, it came out in Blender 3.1, which itself came out 4 days ago (as of writing). Lucky me!
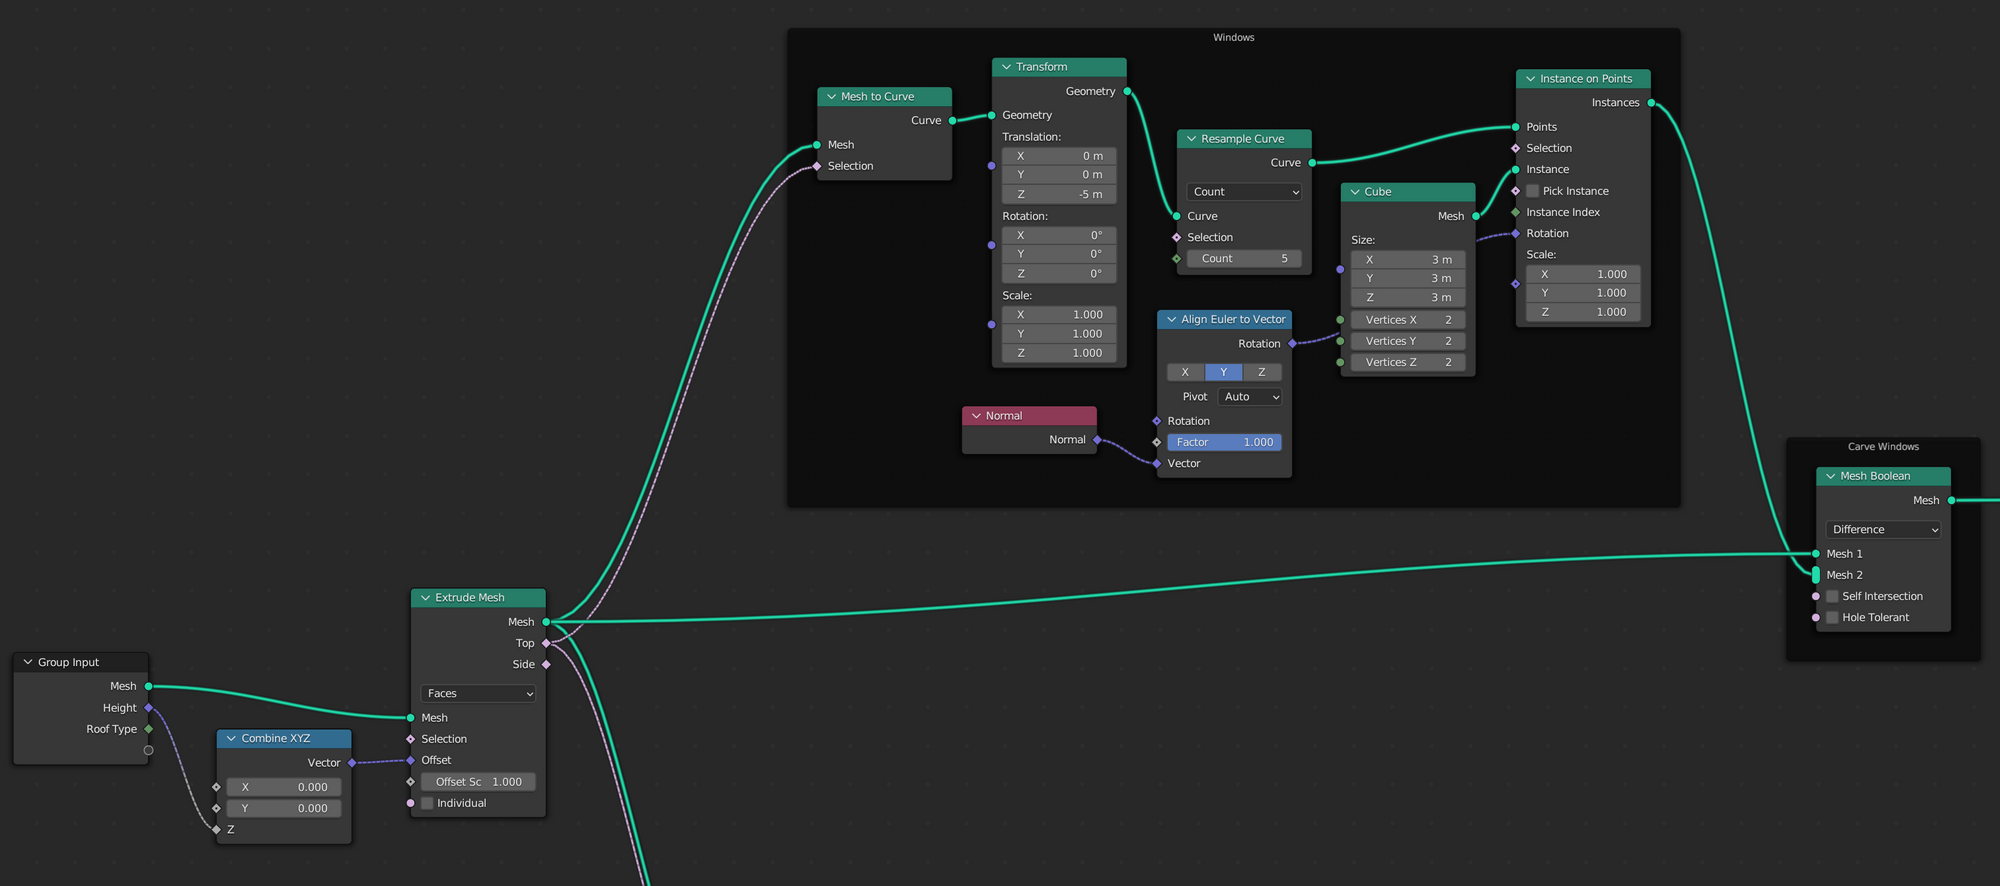
Windows
To carve out windows from the walls, I created evenly spaced cubes at a desired height. Then I used the Mesh Boolean node and subtracted those cubes from the walls.
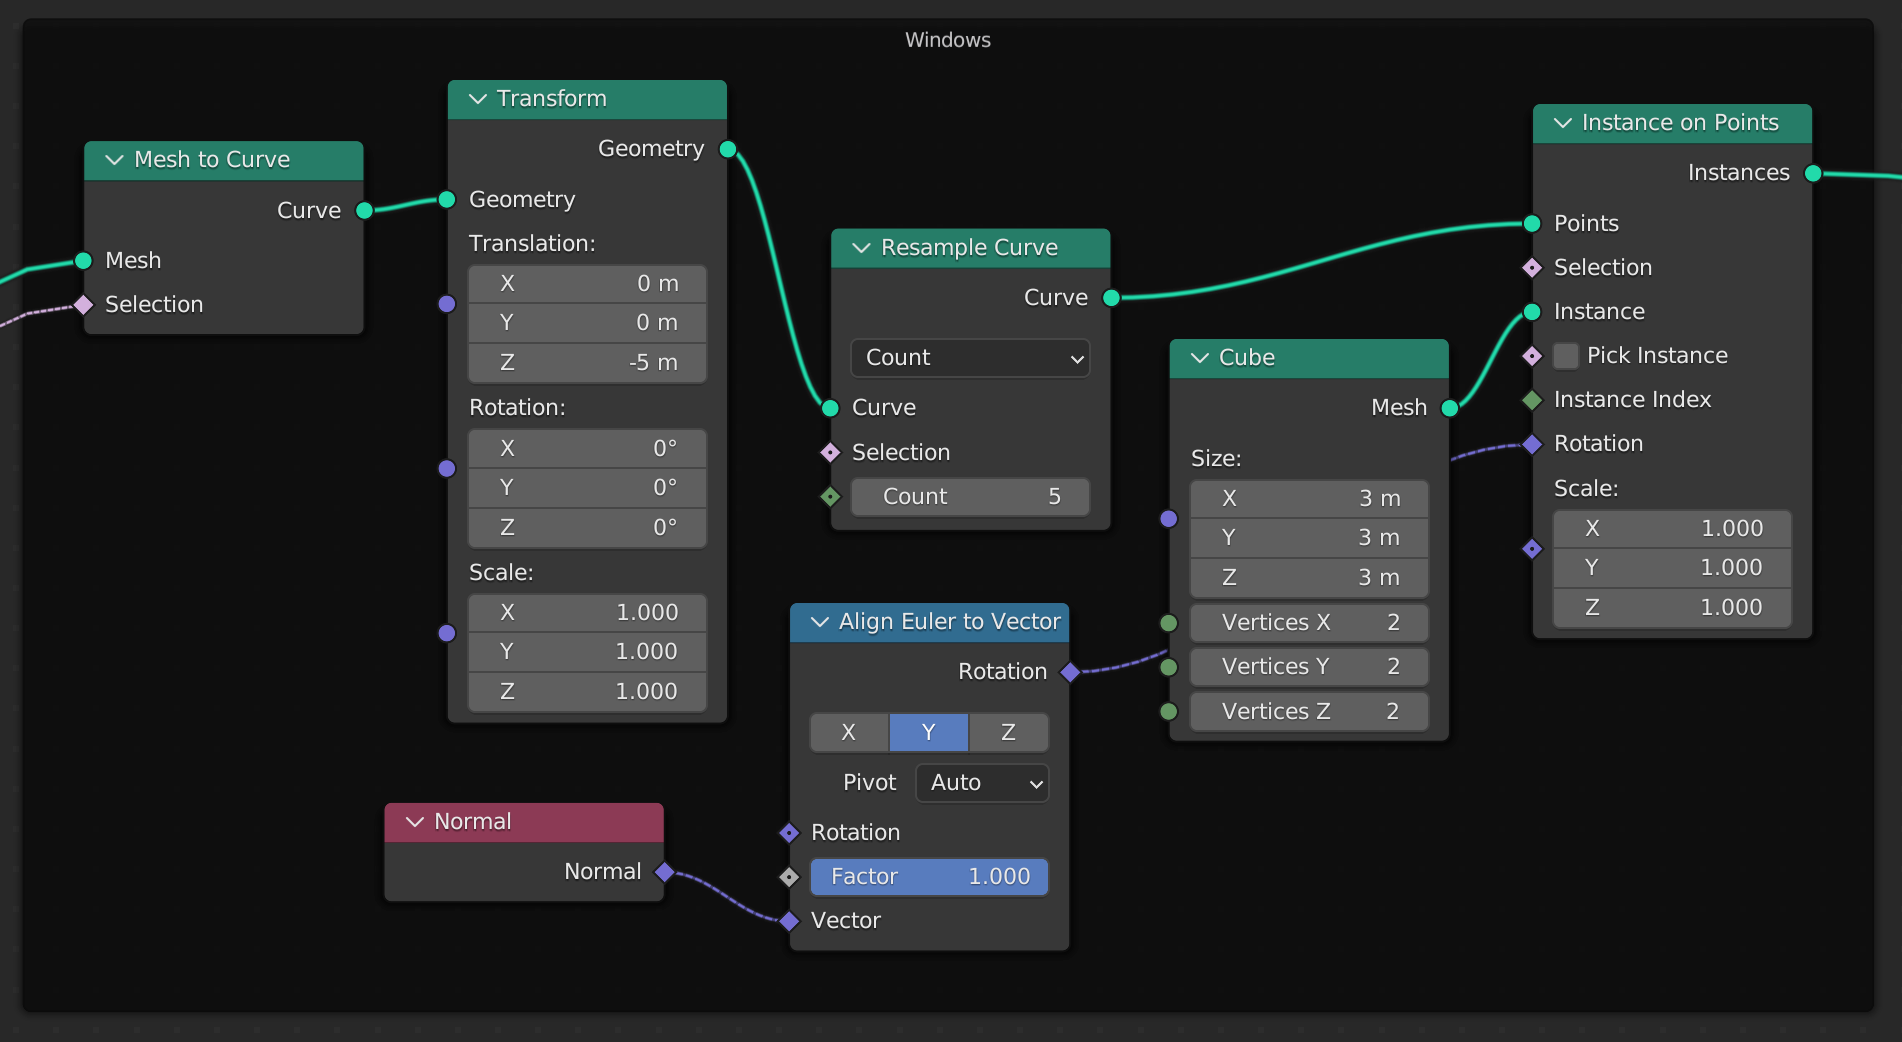
But there is one issue: the windows being carved out are not punching holes in the walls. It only pushes the cube shapes into the walls.
After some experimentation on standalone shapes, I found out that it's because the wall mesh isn't proper. It seems like the Boolean difference operation would actually punch a hole if the wall was an actually closed, full mesh with actual depth. Unfortunately there is no Solidify Geometry Node. In the next approach below, you'll see how I attempted to recreate walls with depth myself.
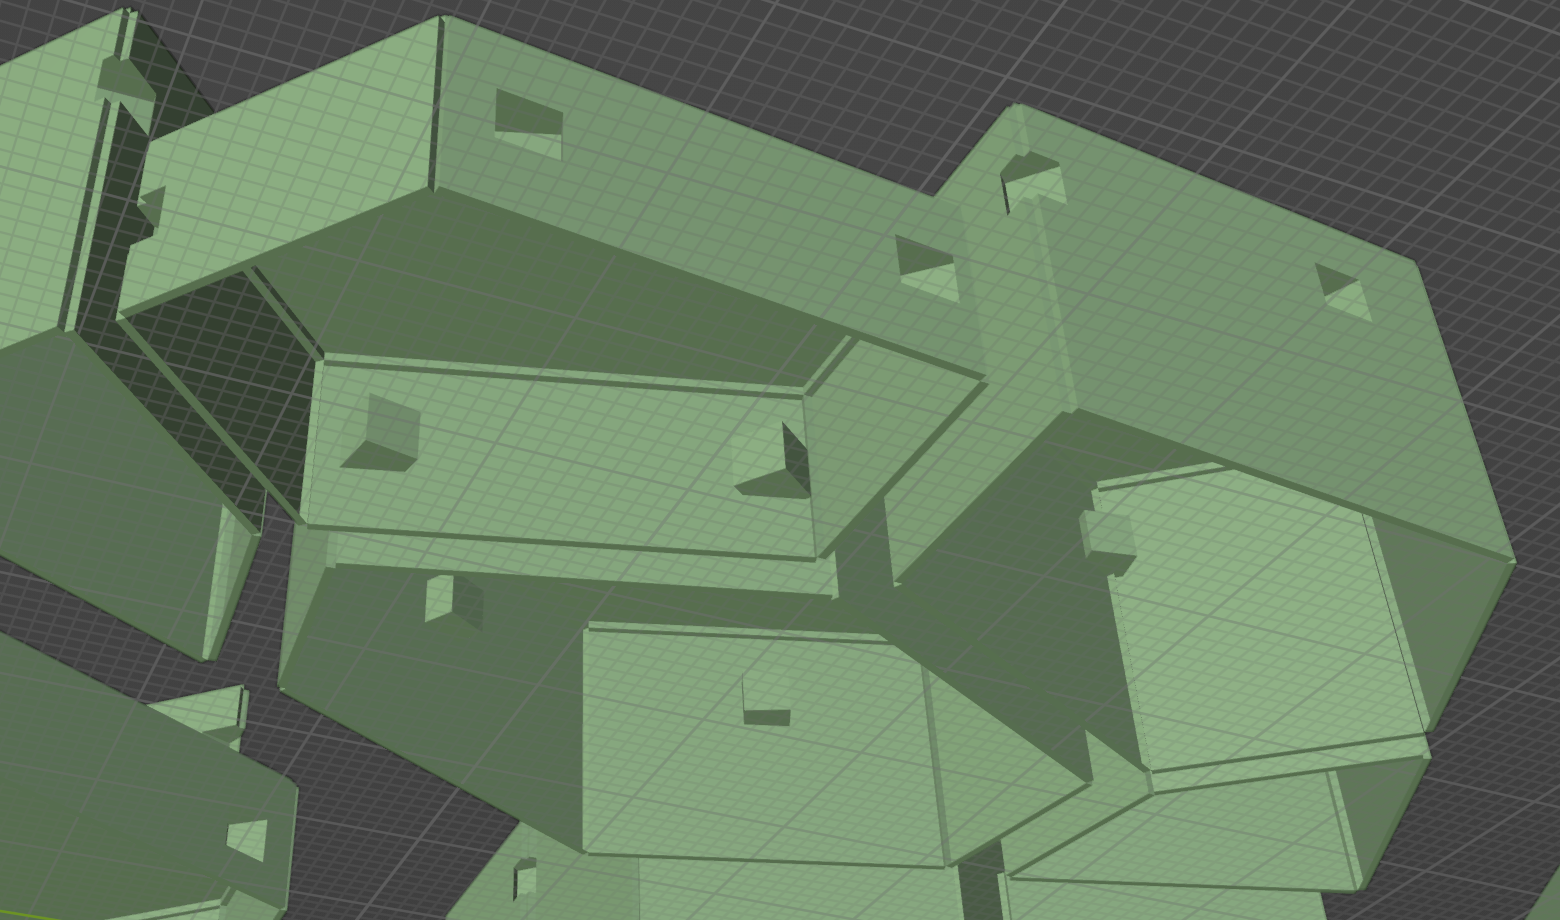
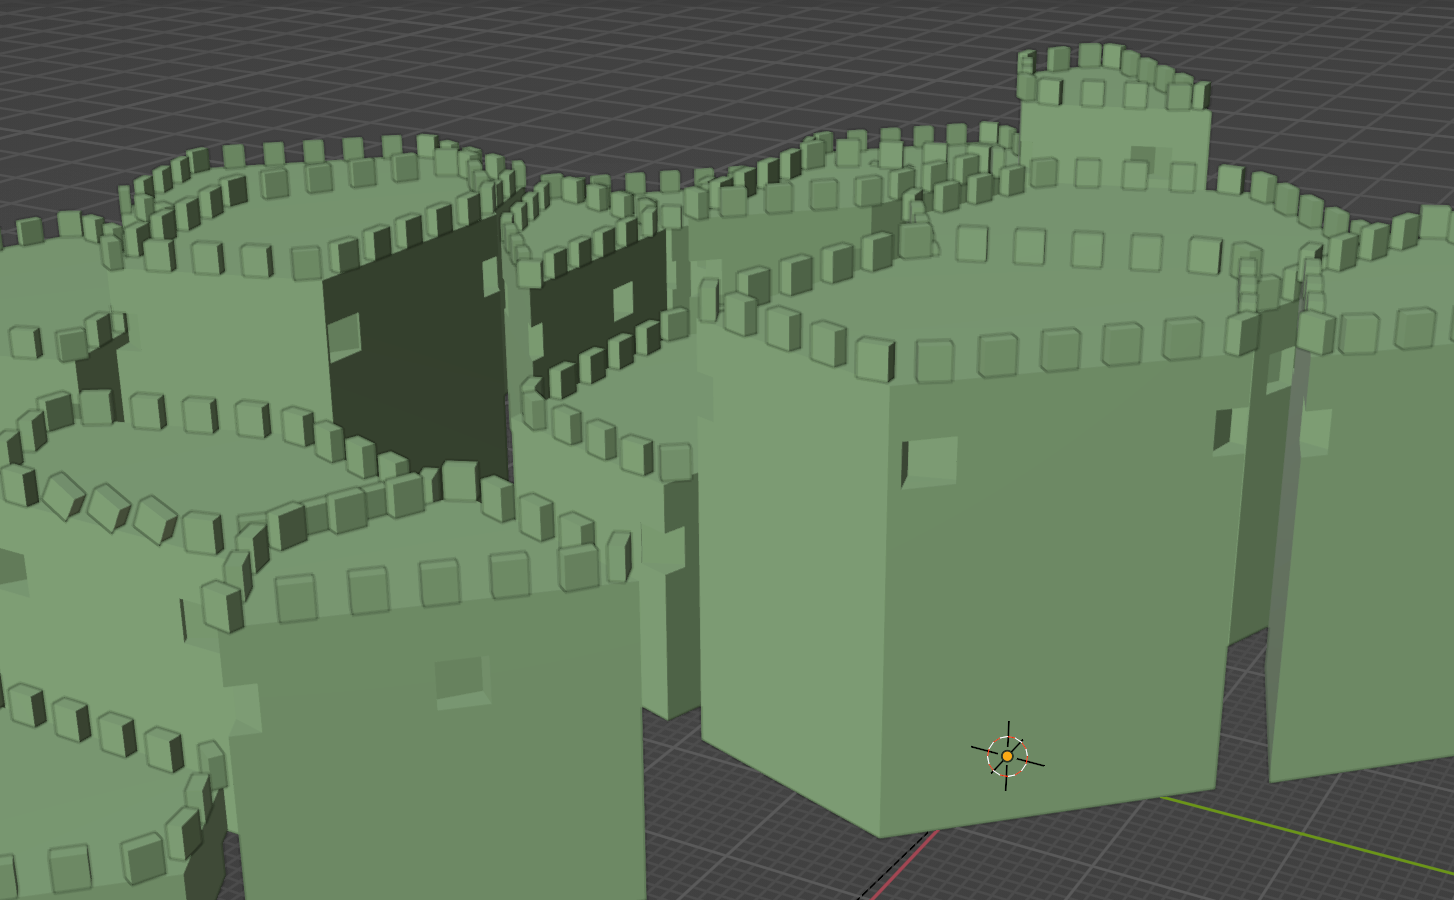
Roof "rampart"
I won't show the Nodes this time cause it's more of the same. Lay out cubes and orient them to face outside, then join the geometry.
Next approach: solidified wall with Mesh to Curve
In order to make solid walls with actual depth, one way is to use a Mesh to Curve node, and to give it a Rectangle as a Profile Curve.

As you can see, using walls with actual depth, punching holes works. You can see through the windows and doors.
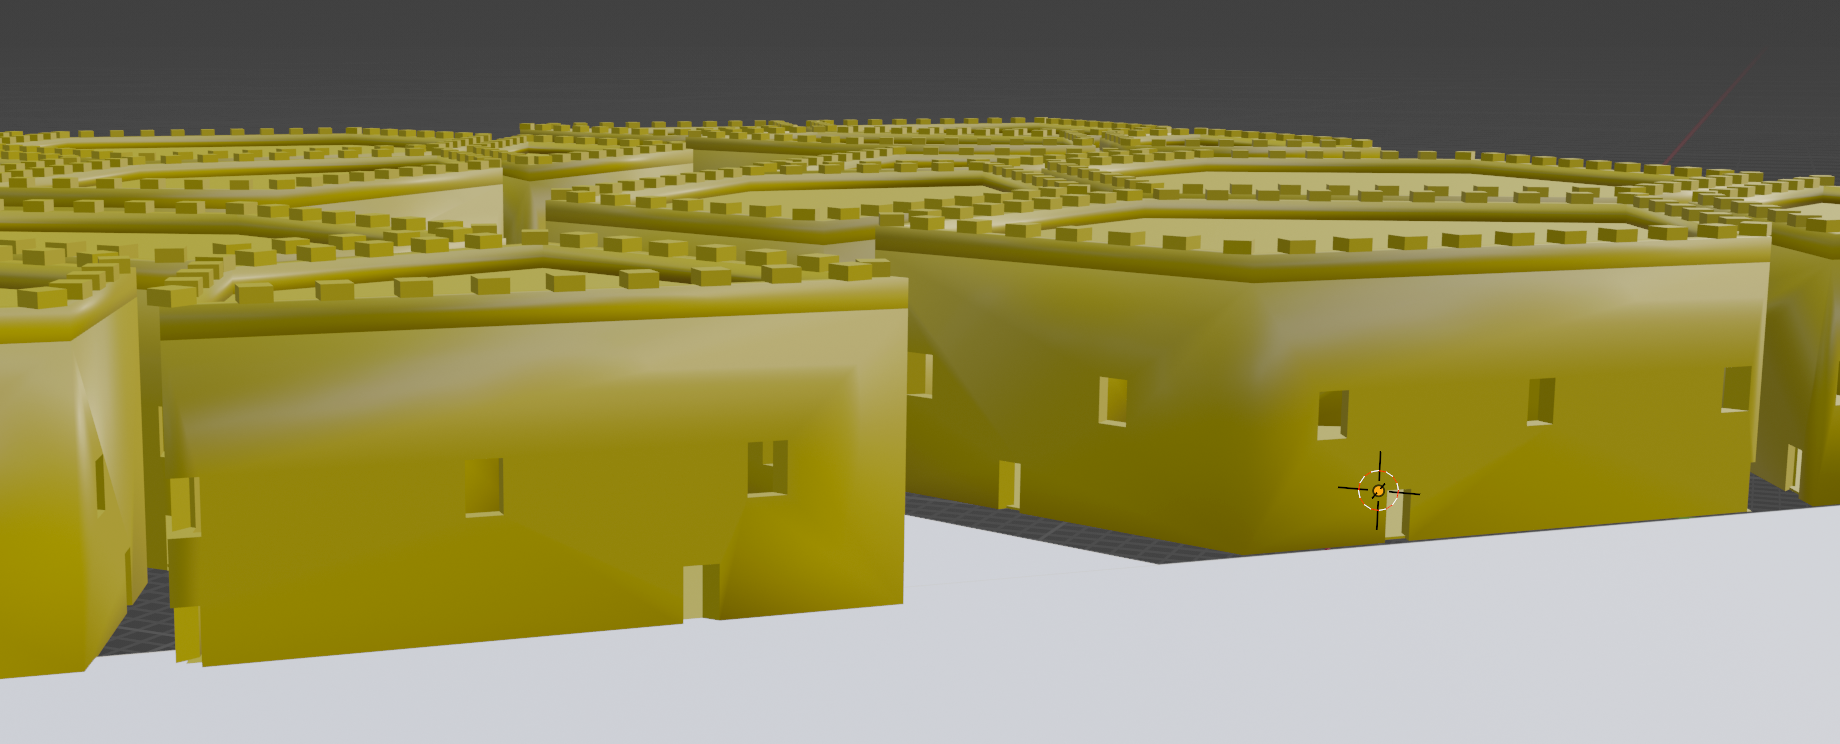
The problem with this approach, though, is that it forces us to use the same height for each and every building. Indeed, take a look at this:
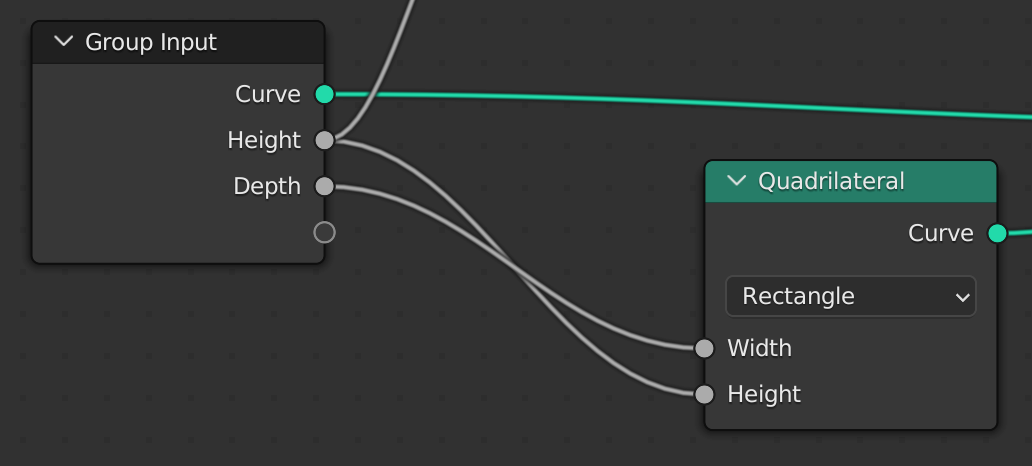
Notice how the height parameter is represented by a circle. This means it is a fixed value. It can only be set to only one value. It could be parameterized, but it is still just one value.
On the opposite, the previous method used Extrude Faces, which accepts a Field. A field is a dynamic value. Technically they call it a "a function". This makes it possible to extrude each face with a different height value.
Next approach: place pre-made houses
The first two approaches had a great advantage: they could make houses that fits any organic-looking floor plan that the Voronoization would produce. In other words, the houses don't have to be simply square or rectangular at a preset size.
On the other hand, it adds an important limitation. Since we're generating all the houses simultaneously, any custom value we introduce has to be supported by the Nodes. In the second approach, for the height of the walls, we saw that because Quadrilateral takes a set value instead of a function, we could not make houses of different heights.
The approach I'll discuss now might be the most intuitive one, which is to have a small collection of premade assets, and place those buildings wisely. The houses won't fit snugly into the floor plans like before anymore. But we get several advantages:
- we can easily import building assets from any source. We could model our own, manually or with geometry nodes. Or we could download assets from somewhere.
- if we model a building our own with geometry nodes, we are no longer restricted to using only nodes which use Fields for customization. We can use any node we want. It's also much easier to reason about since we only have to think about the one house we're building.
Incidentally, it looks like that's how they actually do it in the VFX industry. See this YouTube video. It came out yesterday (as of writing). In the video, a VFX artist at Industrial Light & Magic explains how they made a scene of a city in Dune. Yes, Denis Villeneuve's Dune. They show how they bought some building assets (for $139.30 haha), then just laid them out procedurally.
I'll experiment with this approach and report back later.