Beginning Android – Authentication
Now that the skeleton of the app is made and it is pushed to the Alpha channel, it is time to build real functionality.
In the previous post, we discussed how to set up a new Android app, sign it and publish it to the Play Store in a closed Alpha.
Android Sign-in
I started following the guide on Android Sign-in. First I got my configuration file. Then I added dependencies according to this page. After copy/pasting the code snippets, a compile error came up when calling enableAutoManage.
// Build a GoogleApiClient with access to the Google Sign-In API and the
// options specified by gso.
mGoogleApiClient = new GoogleApiClient.Builder(this)
        .enableAutoManage(this /* FragmentActivity */, this /* OnConnectionFailedListener */)
        .addApi(Auth.GOOGLE_SIGN_IN_API, gso)
        .build();
The problem was that my class extended Activity. However using the auto manager required a FragmentActivity or AppCompatActivity. The note in the tutorial said:
If you can't extend FragmentActivity, you must manually manage the GoogleApiClient connection lifecycle.
Manually manage the connection to Google API? No thank you! I had seen Fragment mentioned in the Android developer tutorials, and I guessed that AppCompatActivity was somehow related to the Backwards Compatibility checkbox from when I created my project.

When I created the project, I selected the highest API version possible to make sure I had access to the latest features of Android, and also disabled Backwards Compatibility to avoid compatibility errors. Coming from a Web development background, I know how hard it is to maintain backward compatibility, even if some tools supposedly make it transparent to the developer.
However I did not feel like reading about the intricacies of Fragment until I worked on actual UI, nor about backward compatibility until I had an MVP that worked on my phone.
And then it dawned on me. What am I doing on the Developer pages for Android Sign-in? I had already decided to use Firebase Realtime Database, so I should be reading about Firebase Authentication with Google, not Android Sign-in!
Firebase UI Auth
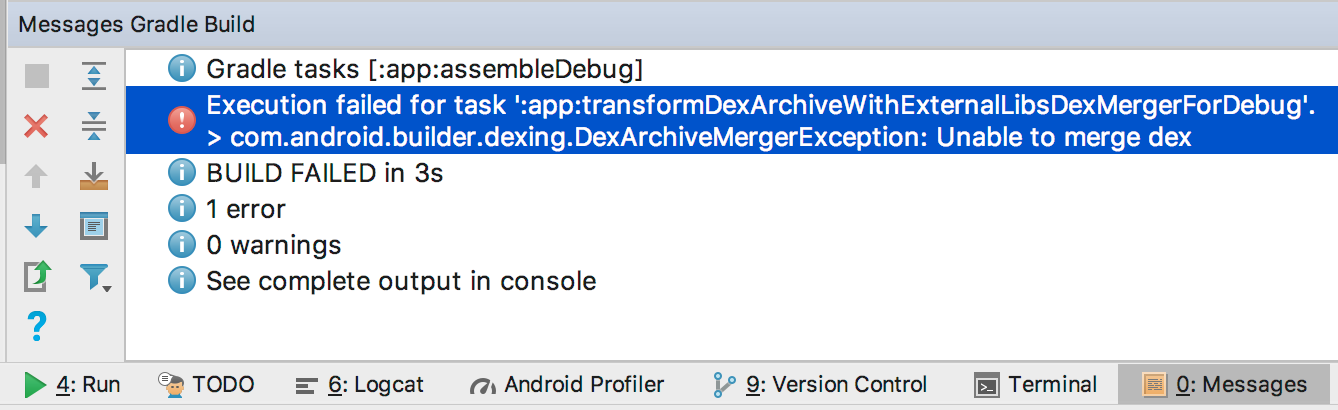
So I went to Firebase Authentication's Get Started, added the dependency to Firebase Auth into my gradle script. Android Studio started complaining about my dependency:
Error:Execution failed for task ':app:processDebugManifest'.
> Manifest merger failed : Attribute meta-data#android.support.VERSION@value value=(26.0.1) from [com.android.support:design:26.0.1] AndroidManifest.xml:28:13-35
  	is also present at [com.android.support:support-v4:26.1.0] AndroidManifest.xml:28:13-35 value=(26.1.0).
  	Suggestion: add 'tools:replace="android:value"' to <meta-data> element at AndroidManifest.xml:26:9-28:38 to override.
It looked like my app was using com.android.support version 26.1.0, but Firebase Auth was using 26.0.1. I did not know how to make Firebase Auth also use 26.1.0, so I downgraded my own app's dependency to 26.0.1. It worked. I might get back to it later to clean it up.
After fixing this, I realized once again I was not reading the right page. This page was about manually signing in with Firebase Authentication. What I was really looking for, and what the video was talking about was Firebase UI. The Introduction on Authentication actually recommends to use that component because it handles the whole authentication flow. After a few clicks, I was reading the documentation on Firebase UI Auth, and pasting only the pieces I needed to support Google sign in (no Facebook, Twitter or email sign in). I compiled the app and ran it on my phone and... it worked! The app showed the Google sign-in picker. When I picked my email account, the app said I was signed in, and it opened the second activity.
SnackBars
The sample application for Firebase UI Auth uses snackbars to show sign-in status, like when the app succeeded or failed to sign in. I added the same code into my app:
@BindView(R.id.root)
View mRootView;

[...]

@MainThread
private fun showSnackbar(@StringRes errorMessageRes: Int) {
    Snackbar.make(mRootView, errorMessageRes, Snackbar.LENGTH_LONG).show()
}
This piece of code uses the @BindView annotation. A quick search reveals that it is provided by a library called Butter Knife. It is cleaner way to get a View with the right type than casting. Instead of:
title = (android.widget.TextView) activity.findViewById(R.id.title);
subtitle = (android.widget.TextView) activity.findViewById(R.id.subtitle);
You could write with Butter Knife:
@BindView(R.id.title) TextView title;
@BindView(R.id.subtitle) TextView subtitle;

@Override public void onCreate(Bundle savedInstanceState) {
    ...
    ButterKnife.bind(this);
    ...
}
It looked much cleaner, but when I ran the app, I got an exception about how mRootView was still uninitialized. I did make sure that I called ButterKnife.bind(this) before showSnackbar. After struggling for a while, I searched the web again and found this comment.
Butterknife is based on apt, but for kotlin, you'd like to use kapt
Not sure what apt or kapt is. But what it means is Butter Knife won't work as is. I had struggled long enough with this, and I didn't need the convenience of ButterKnife yet. I simply went for
Snackbar.make(findViewById(R.id.container), errorMessageRes, Snackbar.LENGTH_LONG).show()
Signing out
Signing out seems easy on paper:
AuthUI.getInstance().signOut(this)
However the method requires a FragmentActivity or AppCompatActivity. That error again! Why does Firebase UI Auth also require that instead of simply an Activity? I later found this post about the same issue. According to the Developer Advocate answering the question, using AppCompatActivity does not have any downside. So I went ahead and converted my activity to extend AppCompatActivity instead of Activity. Doing so gave me a new compile error: java.lang.IllegalStateException: You need to use a Theme.AppCompat theme (or descendant) with this activity.. I had to add android:theme="@style/Theme.AppCompat" to my activity in the manifest for it to compile again.
Random compile error
Right after everything seemed to be working, I started getting an obscure error message. A quick search returns a post on Stack overflow mentioning Android Studio 3 beta. Not sure if it is related. After cleaning and rebuilding a few times, the error disappeared.
Running on physical device
Instead of deploying to an emulator, I wanted to deploy to my phone. This might free up CPU resources for Android Studio to build faster. I have yet to determine if running on the phone is actually faster than on the emulator. I'll experiment with it another time.
Running over USB
I had to enable Developer mode and to enable USB debugging according to this page. Once set up, I whitelisted my computer on my phone so that the phone would allow the computer to send APKs to it.
Running over network
Next I wanted to deploy APKs over the network. My Macbook Pro has only two USB-C ports, and I needed both: one for power, one for my external monitor. I did not have an extra port to deploy over USB.
First I had to make the phone listen to port 5555, then I connected to it over adb:
$ adb tcpip 5555
restarting in TCP mode port: 5555
$ adb connect 192.168....
connected to 192.168....
Setting up the repository
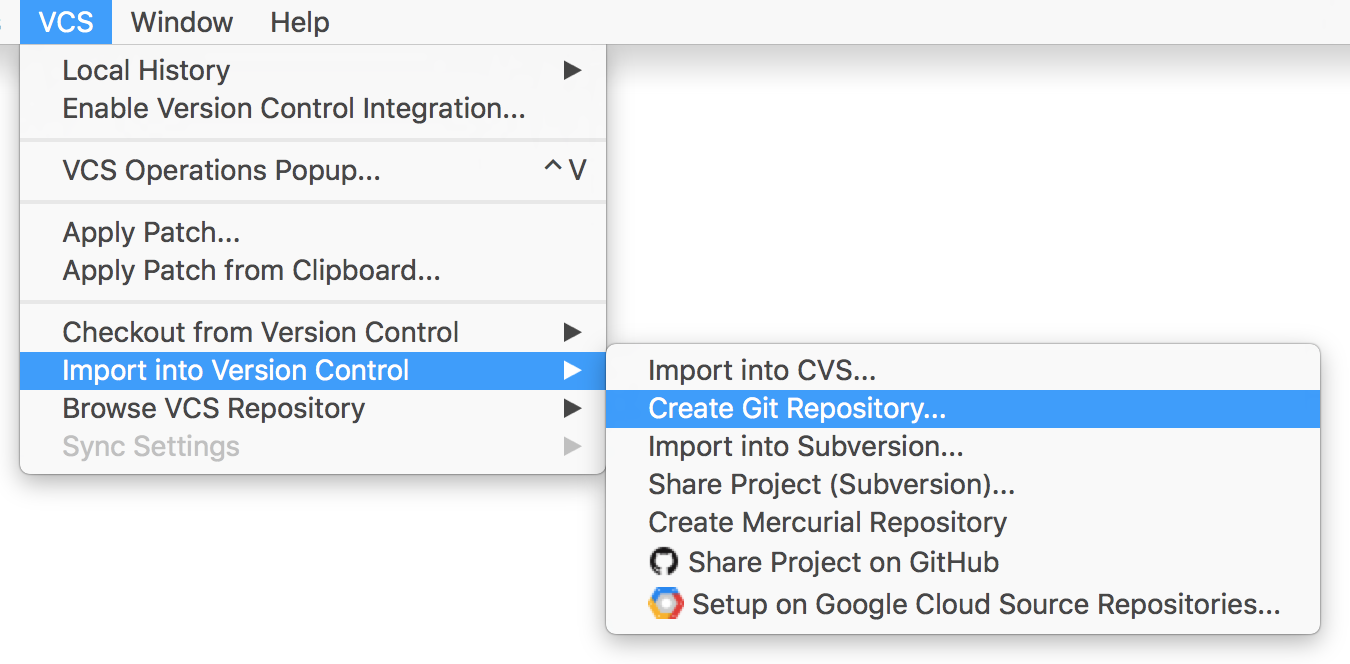
Android Studio
I could have initialized the repository with a simple git init. However I hoped Android Studio could initialize the repository for me, and set up the .gitignore file to not include generated files. Luckily, it did!
The commit window in Android Studio also provides a few cool features like:
- Reformat code
- Rearrange code
- Optimize imports
- Code analysis
BitBucket
To keep the repo on the cloud, I used BitBucket. I like it because it provides free private repositories.
- Created a repository
- White-listed my computer
- Went into Settings, SSH keys
- Generated new SSH keys on my laptop
- Added the key for white-listing
See instructions.
Conclusion
That was a whole lot of work to publish an app that does nothing! And we have a few more things we'll need to research like how backards compatibility works, the differences between the different APIs. This would allow us to make this app compatible with much older devices. I'll add these tasks to my app once it supports adding todo's!
Read on to see how to store and access data in the database.